
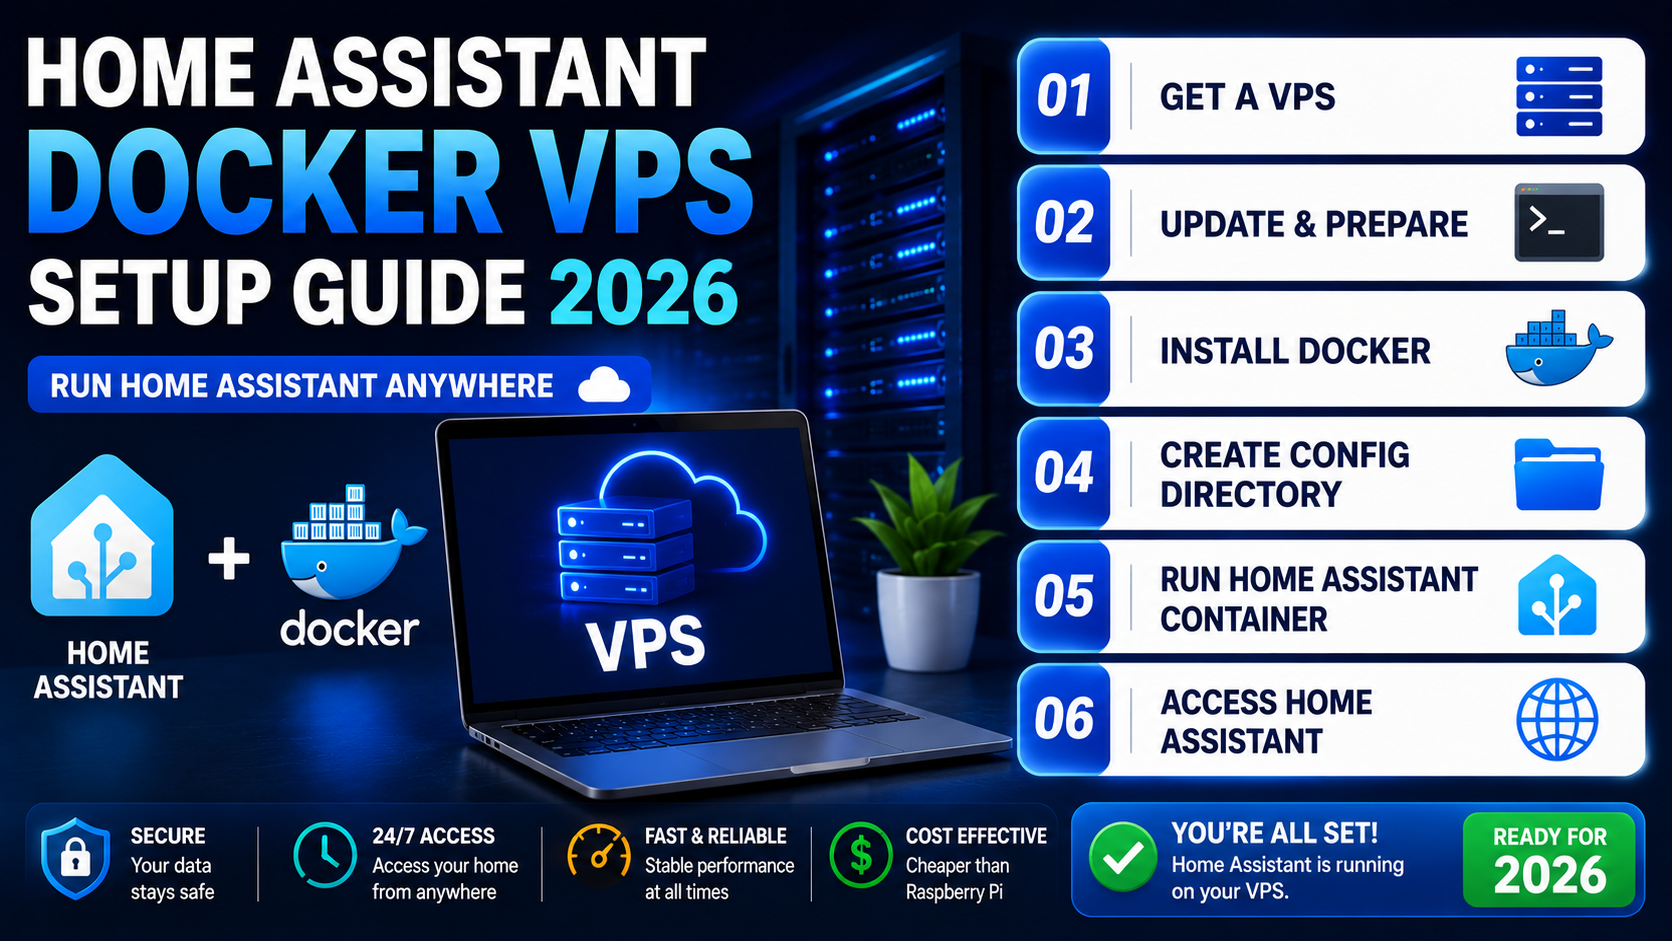
5 Best Ways to Run Home Assistant Docker on a VPS
Running Home Assistant with Docker on a VPS is one of the best ways to build a private smart home dashboard with remote access, automations, and monitoring features. A VPS keeps Home Assistant online 24/7 while Docker simplifies deployment and maintenance.
This guide explains the 5 best methods and practices for setting up Home Assistant Docker on a VPS securely and efficiently.
Why Use Home Assistant Docker on a VPS?
Using Home Assistant inside Docker provides better flexibility and easier updates compared to traditional installations. Hosting it on a VPS adds additional benefits for remote monitoring and automation control.
Main advantages include:
- Remote smart home access from anywhere
- Always-online dashboards and automations
- Easy Docker container management
- Better scalability for growing smart homes
- Improved backup and migration options
- Secure integration with MQTT and APIs
A VPS-based Home Assistant setup works especially well for cloud-connected devices, MQTT brokers, notifications, and multi-location monitoring.
1. Deploy Home Assistant Using a Docker Template
The easiest way to run Home Assistant on a VPS is by using a ready-made Docker template from your hosting provider.
Benefits of Docker Templates
Docker templates automate the installation process by:
- Pulling the Home Assistant image
- Configuring networking automatically
- Creating Docker containers instantly
- Simplifying dashboard deployment
This method is ideal for beginners who want a fast setup without manually configuring Docker Compose files.
Open the Home Assistant Dashboard
After deployment, access Home Assistant through:
http://SERVER-IP:8123
Replace SERVER-IP with your VPS IP address or configured domain name.
Complete the Home Assistant Setup
During onboarding:
- Create the administrator account
- Set timezone and location
- Configure smart home preferences
- Add initial integrations
Once completed, your Home Assistant Docker VPS setup is ready.
2. Install Home Assistant With Docker Compose
Using Docker Compose gives you complete control over the Home Assistant container environment.
Create the Home Assistant Folder
Run:
mkdir homeassistant
cd homeassistant
Create the Docker Compose Configuration
Create the file:
nano docker-compose.yml
Add this configuration:
services:
  homeassistant:
    container_name: homeassistant
    image: "ghcr.io/home-assistant/home-assistant:stable"
    volumes:
      - ./config:/config
      - /etc/localtime:/etc/localtime:ro
    restart: unless-stopped
    privileged: true
    network_mode: host
    environment:
      TZ: Europe/London
This configuration stores all Home Assistant data inside the config directory.
Start the Container
Launch Home Assistant:
docker compose up -d
Verify the container:
docker ps
Docker Compose makes updates and maintenance much easier for advanced users.
3. Build Smart Home Automations and Dashboards
After installing Home Assistant, the next step is creating dashboards and automations.
Add Smart Home Integrations
Home Assistant supports:
- Smart lights
- Sensors
- Cameras
- MQTT devices
- Smart thermostats
- Energy monitoring systems
Cloud-connected integrations work especially well on VPS-based installations.
Create Dashboard Views
Organize dashboards by:
Room Categories
- Living room
- Kitchen
- Bedroom
- Office
Device Categories
- Lights
- Cameras
- Sensors
- Thermostats
- Security devices
A clean dashboard improves monitoring and automation management.
Create Your First Automation
Example automation:
- Trigger: Sunset
- Condition: Someone is home
- Action: Turn on living room lights
Additional automation ideas include:
- Door notifications
- Motion detection alerts
- Temperature-based fan control
- Automatic nighttime lighting
4. Secure Home Assistant Remote Access
Security is one of the most important parts of a Home Assistant Docker setup.
Enable HTTPS Protection
Use SSL certificates to encrypt dashboard traffic and protect credentials.
Use Strong Login Credentials
Always secure:
- Home Assistant admin accounts
- VPS root access
- SSH connections
Configure Firewall Rules
Only allow required ports such as:
- Port 8123 for Home Assistant
- Port 22 for SSH
Block unnecessary public access.
Use VPN or Private Tunnels
VPN access adds extra security for remote smart home management.
This is highly recommended if your Home Assistant setup controls:
- Cameras
- Smart locks
- Alarm systems
- Garage doors
5. Choose the Best Home Assistant VPS Setup
Different Home Assistant deployment methods suit different users.
Home Assistant Docker
Best for:
- VPS hosting
- Docker users
- Linux servers
- Flexible container setups
Advantages:
- Lightweight deployment
- Easier scalability
- Better Docker stack integration
Home Assistant OS
Best for:
- Beginners
- Local smart home installations
- Simple management
Advantages:
- Built-in add-ons
- Easier maintenance
- Simplified updates
VPS vs Local Installation
A VPS installation is best for:
- Remote dashboards
- MQTT communication
- Cloud integrations
- Multi-location monitoring
Local installations are better for:
- Zigbee devices
- Bluetooth integrations
- LAN-based smart devices
Should You Run Home Assistant With Docker on a VPS?
Running Home Assistant Docker on a VPS is an excellent solution for users who want secure remote access, always-online automations, and centralized smart home management.
Docker simplifies installation and updates, while VPS hosting provides reliability and accessibility from anywhere.
If your setup mainly uses cloud-connected devices, MQTT, APIs, and remote dashboards, a VPS-based Home Assistant Docker setup offers one of the most flexible and scalable smart home solutions available today.
1 thought on “Home Assistant Docker VPS Setup Guide 2026”